Raspberry Pi’s are little computers that can be used for various things with the right parts, but I use it for a basic setup of retro gaming. These are strong enough that they can hold hundreds of games ranging from Nintendo, Super Nintendo, N64, Sega, Atari, and Playstation. You can pick up the Pi’s and accessories for around $75-$150, prices vary by types of controllers, size of memory, etc., but then you can flip it for around $50 more to cover your time. 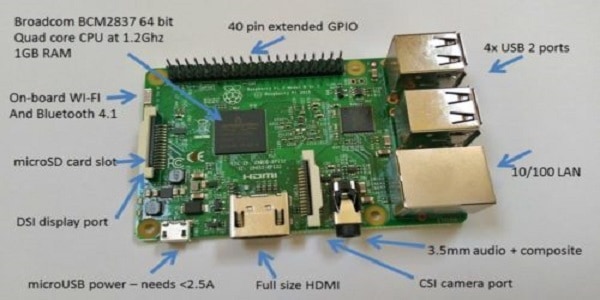
Modifying Raspberry Pi 3 for retro gaming
Almost every house probably has a Nintendo Wii, did you know you can add retro gaming to it as well? In addition to all the systems that the Pi shows, the Wii is also strong enough to carry Gamecube games too. You can pick these up from anywhere between $40-$100, add your work to it and then flip it for around $50 more. 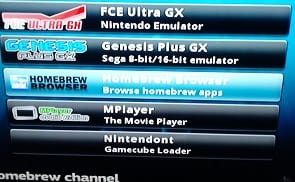
Modifying Nintendo Wii for retro gaming
Ever wanted to learn graphic design but scared of the price tag that comes with Photoshop? I recommend Affinity Designer, I have been using it for a while now and love it. It costs around $50 but once you get the hang of it, your creative side can take off and pay for itself;
After spending numerous hours working on electronics, everyone will have some kind of tip or trick to share to cut down maintenance time. Electronics can be very intimidating, one little mishap can set you back hours and/or fully erase critical data so one tip is to always back up your data somewhere (flash drive, external hard drive, cloud, etc.) in order to prevent these mishaps. I made this page to share some mishaps I have had, the solutions to remedy them, and as well as a few other tips I learned along the way when playing with computers and other devices.
First off, when dealing with computers as well as other electronics with the worldwide web, there are things you need to do in order to keep them in great shape and working properly, here is a basic list of tips;
- Use passwords that are not easily detectable by anyone, other than yourself and change it on a regular basis.
- Backup important documents and pictures online through a cloud or offline through CDs, flash drives, or external hard drives
- Have PC protection; antivirus, firewall, cleaners, etc.
- Use email filtering; when in doubt, throw it out
- update your system(s) regularly
- Let recipients know when you are sending them an email attachment
- Remember viruses can come from anywhere at anytime, shit happens.
- Lock your computer if you fear someone in the area may access it while away, you can do so easily by holding the window button on the bottom left of your keyboard and pressing the L
- Password protect files like excel with critical info that you do not want to be altered by another user.
- Use a secured credit card if possible when purchasing online
- Lockdown your wireless connection
- Scan e-mail attachments before opening them, even if from a trusted recipient.
- Be careful downloading files and programs from sites you do not know or trust, if its something you feel you really need or want, run cleaners and scanners afterwards.
- Don’t open unexpected email attachments, especially from unknown sources
- Don’t use the same password for everything
- Don’t open the PC case while still plugged in
- Don’t panic if your computer crashes.
- Don’t give out valuable information like credit card numbers or social security numbers unless through a secured site.
- Don’t reply to junk or spam e-mail unless you know for sure it ended up in the folder by accident.
Want to have some old childhood games at your disposal, on one system? We are talking Nintendo, Super Nintendo, Nintendo 64 and many more. Follow these steps and you will have them at the edge of your fingertips in no time.
The hardware you will need are linked below to Amazon where I ordered mine. They are;
Raspberry Pi; $50
Micro SD card (w/adapter); $10
Computer adapter for SD card; $7
Controllers; $12
That’s it! For less than a $100 you can get more childhood games than you can think of.
Step 1: Acquiring the supplies;
Raspberry Pi
I purchased this Pi 3 kit through Amazon for a very fair price and it has been worth every penny, I would highly recommend it;
Controller(s)
You will also need the controllers, which you can use any controller type for any system. Keep in mind that if you strictly use SNES controller, like I do, you may need to reconfigure it to play some playstation and N64 games where they have L1 and L2 buttons needed to play some games.
Secure Digital Card (SD card)
You will need a micro SD card, if you do not have one, you can purchase one through Amazon with an adapter which you will need to plug into your computer provided it has the slot for it;
If you do not have a connection on your computer for an SD card then you will need an adapter for the computer, like this (sd card adapter is not necessary if you go this route since a micro sd card fits too);
Step 2: FORMATTING;
Once you have all your supplies you will need to format the SD card to FAT32. You can do so by downloading Fat32 formatting;
http://fat32-format.en.softonic.com/

Step 3: Installing Retropie;
After your SD card is formatted, now it is time to install Retropie. Here is a link to do so;
Click on the download tab and then on the new page, download Pi 2/Pi 3

Step 4: Burning the image;
Once you have Retropie downloaded to your PC, you will need to unzip it and burn it as an image to your SD card. I recommend using this imager;
https://sourceforge.net/projects/win32diskimager/
Once saved, run it, locate your Retropie unzipped folder and burn your image to the SD card.
Now you can pull your SD card and plug it into your Pi. Start your Pi (plugging power cord in last) Once booted, click on the RetroPie icon and setup your wifi at the bottom, or plug in your ethernet.
Once your Pi has internet, check your computer networks, find Retropie, Roms and upload your unzipped roms to each emulator you plan to use.
Step 5: Find your ROMS;
You can upload via direct connect or through flash drive (see step 6)
A couple good sites I used for them are
You save them as a zipped folder in your downloads folder and then unzip them and add them to the retropie roms folder
NOTE: ANTI-VIRUSES MAY BLOCK YOU FROM GETTING THE CONTENT, AND DISABLING IT, MAY INFECT YOUR PC WITH VIRUSES/MALWARE. I STRONGLY RECOMMEND RUNNING CLEANERS AND SCANNERS WHEN DONE DOWNLOADING, JUST TO BE SAFE.
Step 6: Configuring your flash drive (optional);
Now, if you use a flashdrive instead to load games, format it like the sd card and then create a folder called Retropie. Once you have the folder, take out the flashdrive and put it into the Pi. When it is done blinking (or after 3 minutes) put it back in the computer and that folder you created should have folders in it like these;

Open the Roms folder and find the system for which you downloaded the games, there are hundreds, and most are abbreviated; NES, SNES, N64, PSX, etc.
Step 7: Extraction;
Now you will need to open the folder (downloads) and find your games. Again, you will need a program that unzips these folders to extract the files, I use Winopener and 7-zip for these, you can get those apps here;
https://www.microsoft.com/en-us/store/p/winopener/9nblggh5xmmg
http://www.7-zip.org/download.html
Once you have that you can decompress and extract each file and place it in your Roms appropriate system folder on your Retropie flash drive (or Retropie itself through internet) and after all the games you want are loaded, it is time to test and play.
Step 8: Testing;
Make sure you plug in everything on your Pi with power cord being last so it detects everything. Upon startup you will configure your controller which is self explanatory, then it is time to play. Every time you add games directly to the Pi through internet, you will need to reboot your Pi.
Want to take it a step further and add cheat codes?
Want to upload cheat codes to your RetroPie, Raspberry Pi setup? First, you will need internet on your RetroPie, as well as a separate computer. Once you have the box set with internet you will want to copy down your box’s I.P. address somewhere, you can find the I.P address under RetroPie setup area.
Next, you will need some tools, here are links to download those tools;
STEP 1: Putty
On Putty, you will need your I.P. address here; Type it in where “Host Name” is and keep the port 22. Save it with a name too for quicker availability in the future if necessary. Login to your Pi through Putty, if you have not changed the credentials, it should be;
Username: pi
Password: raspberry
Once in, type “cd cheats” and “mkdir settings” on separate lines, without the quotations.
STEP 2: Notepad++
Now find your SAMBA folders that the Pi is sharing, to do that, use File Explorer in Windows and type \\RETROPIE.
Go into the configs/all folder and find retroarch.cfg. When you have found it, right click over it and open with Notepad++. Once in there press ctrl+F and do a search for “cheat”. Scroll down until you come to a line that reads # Path to cheat database directory. Delete the # symbol from it and where it says “cheat_database_path =” add ~/RetroPie/cheats with a space so it should say;
cheat_database_path = ~/RetroPie/cheats
Now go down to the next section where it says “# path to XML cheat config…” and delete the # symbol in front of “cheat_settings_path =” and then add ~/RetroPie/cheats/settings with a space so it looks like this;
cheat_settings_path = ~/RetroPie/cheats/settings
Next, hit ctrl+F again and this time search for “Retropad Button Combination“, when you find it, delete the # symbol on “input_menu_toggle_gamepad_combo” and edit the section like this;
- # Retropad button combination to toggle menu
- # 0 = none, 1 = L + R + Y + D-pad Down, 2 = L3 + R3
- input_menu_toggle_gamepad_combo = 2
Now save it.
STEP 3: Retroarch
Back on Putty, reboot your Pi with the command “sudo reboot” without the quotation marks. You will need to close Putty and start a new session as well.
On your Pi go to RetroPie settings, then Configure Retroarch / Launch Retroarch RGUI. Go to settings–> directory, and see if Cheat File Dir says “/home/pi/Retropie/cheats“. If it does, go ahead and back out to the main menu of the Retroarch Config GUI. Go to “Online Updater” and choose “Update Cheats“. This may take a minute, it should tell you on the bottom left of the screen when it is complete. Once this is done, back out of the config GUI and quit Retroarch.
Now you’re ready to play with what is already setup from the updater. To access Retroarch during games you press select+X, turn the codes on with left/right arrows and be sure to hit “apply changes” at the top by pressing A and/or start. If you want to add your own codes, delete some, or see a list, go to step 4.
STEP 4: Cheats
Back on putty, and logged into your Pi, you can look through, add, or delete cheat codes. Here are the inputs for each system as is;
- cd RetroPie/cheats/”Game Boy Advance”/”CodeBreaker”
- cd RetroPie/cheats/”Game Boy”/”Game Genie”
- cd RetroPie/cheats/”Genesis”/”Pro Action”
- cd RetroPie/cheats/”Nintendo Entertainment System”/”Game Genie”
- cd RetroPie/cheats/”Playstation”/”GameShark”
- cd RetroPie/cheats/”Sega Game Gear”/”Game Genie”
- cd RetroPie/cheats/”Sega Master System”/”Pro Action Replay”
- cd RetroPie/cheats/”Sega Saturn”/”GameShark”
- cd RetroPie/cheats/”Super Nintendo”/”Game Genie”
Once you’re in either one, you can press “ls” for a list of current cheats. To edit or create new cheat file types you use the following;
nano “Game name in quotations, as it is written in the cheat index.cht”
EX: nano “Super Mario Bros.cht”
The format for codes is;
cheats = 2
cheat0_desc = "Enter a description here"cheat0_code = "GAME GENIE CODE IN CAPS"cheat0_enable = "false"
cheat1_desc = "Enter another description here"cheat1_code = "STILL STAYS IN CAPS"cheat1_enable = "false"
etc….
Then to save, press ctrl+X, then Y when prompted Yes or No on overwriting the file. If it is just a modified cheat, press enter when done. If it is a new game then it should be listed as the name you had under nano “gamename.cht” with the .cht but not the “nano”
Wii-Retro is for those who enjoy the nostalgia in gaming. You can add Atari, Nintendo, Super Nintendo, Sega Genesis, Nintendo 64, Playstation, and even Gamecube ROMS to your Wii easily. There is much more you can do with your Wii but for now, lets stick to the basics; gaming
Tools you will need:
- Wii (of course, with Gamecube controller ports)
- controllers (Wii and Gamecube ones)
- SD card (at least 4gb capacity, bigger is better if you want more games, Gamecube games are 1.3gb each)
- Computer that can take SD cards (you will need to go back and forth between your computer and Wii with your SD card a few times)
Step 1: Format your SD card to FAT32
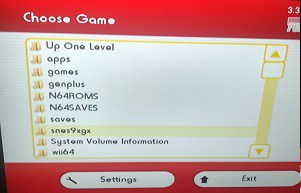
First you need to make sure your SD card is formatted as FAT32, if not, you can do so through gui format HERE. Once that is complete, create 3 folders in your SD card, titling 1 “apps”, the other “Nintendont”, and the last “games”. Put Nintendont in your “apps” folder for now, that is your Gamecube emulator so we will get to that later.
Step 2: Download Homebrew Channel
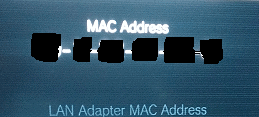
Now you need Homebrew Channel which you can get through Letterbomb. You will need your Mac Address for this which you can find under “Wii settings” in the bottom left corner of your homepage, from there you go to “Console Information”, and while you’re there, also confirm what your Wii version is (should be 4.3U) in the upper right hand corner of the settings area, you will need to know that too.
Now you need to visit the Letterbomb site to input your information.

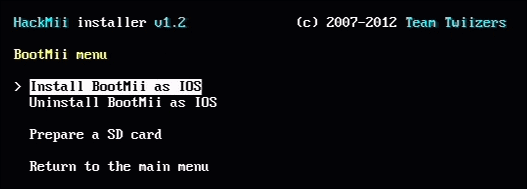
Also go ahead and “bundle the HackMii installer”, you may want to use it later. Enter your “CAPTCHA” and “cut the red wire” when prompted. This should start a “letterbomb.zip” file download. Once downloaded, right-click the file in your downloads and copy it to your SD card and then extract all the files there. Along with your “apps”, “games” and “Nintendont” folders, you should have your zipped letterbomb, a “private” folder, and other files like Apache-2, boot.elf, etc.
Now take your SD card from the PC and put it in the Wii. Click on the mail icon on the homepage on your lower right corner. When it pulls up scroll back a few days and forward, you’re looking for this;
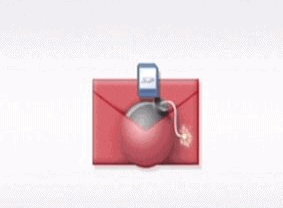
Once you find it, open it.
NOTE: If you don’t see it, put your SD card back in the PC and make sure the letterbomb extracted fully and the extractions are on the main page of the SD card.
After the letterbomb is opened, you should get this after downloading it to the Wii
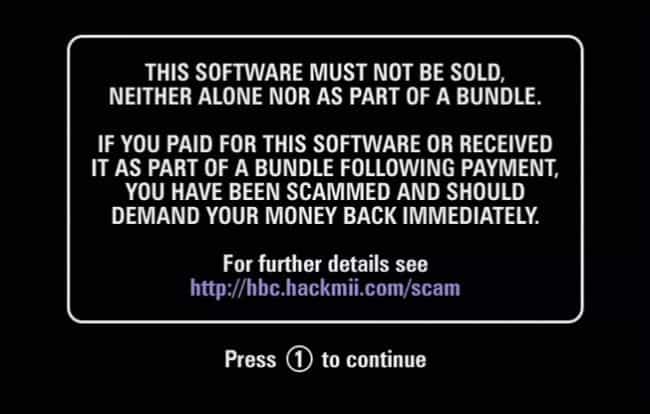
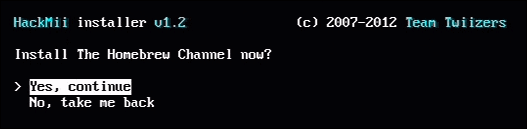
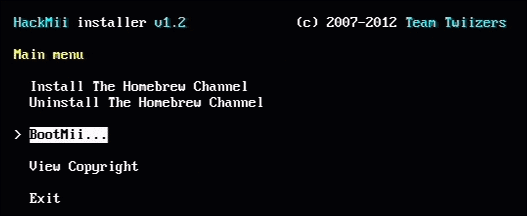
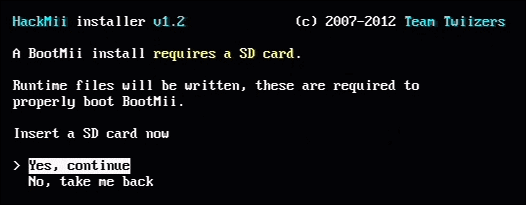
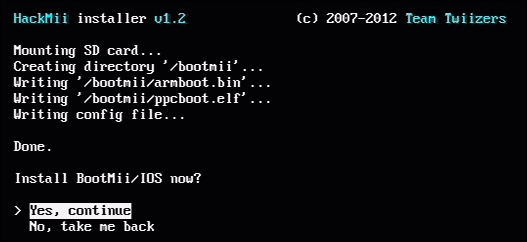
Now you want to install Homebrew channel and Bootmii
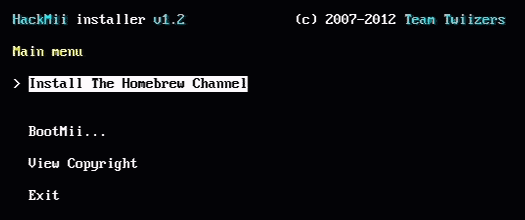


Now you should have Homebrew Channel on your Wii Homepage.
Step 3: Download Homebrew Browser
Next, you will want the Homebrew browser to download all your emulators. I found 2 versions; 3.9 and 0.3 but could only get the 0.3 to work, maybe you will have better luck. Move the SD card back to your PC and download one of these;
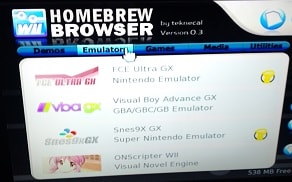
Once you have the zipped folder, copy it and put it in your “apps” folder on the SD card and extract it there. Once that is done put it back in the Wii and run Homebrew Channel and you should get a list like this but with just “Homebrew Browser”

Once you open it up, you should get an install page that may ask to update, in which case hit A when prompted;
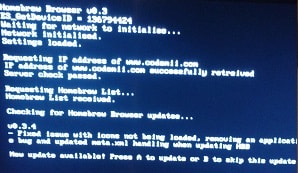
You may get a screen that looks like it froze up, but just wait it out, shouldn’t take long and it looks like this;
From here you can play around and find games, emulators, or media but I just stuck with getting emulators.
Step 4: Download your basic emulators
Now it is time to download the emulators you want. They have quite a few like Nintendo, Super NES, N64, Sega, Atari, Playstation, and more. Once you have the emulators that you want, pull the SD card and put it back in the PC.
Once you have them inline, you can pull them up from the Homebrew Channel and play;


Step 5: Download your Gamecube emulator
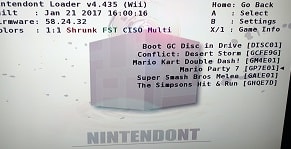
Now, go to your “Nintendont” folder under your apps, download this file; Nintendont-dol and place it in your folder, change the name to boot.dol. You can also download this one, extract it and copy the “boot.dol (loader.dol)” and “meta.xml” files to the Nintendont folder as well.
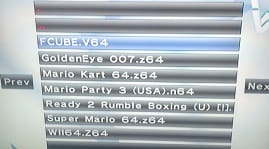
Now, Nintendont is tricky, you don’t actually put the gamecube roms in there, for them you make a separate folder on the main SD card page and call it “games”. Get the games you want, extract them and place them in the folder. You need to double click on each Gamecube game folder you extract and change their “ISO” name to “game.iso” so one page should show all your Gamecube games and each of those should go to at least 1 file saying “game.iso”. Your directory at that point should look like this;
SD Card> Games> “game name”> game.iso
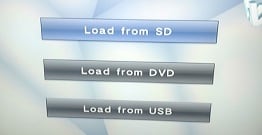
When you upload Nintendont from the Homebrew main page, it should take a few seconds and then take to the loader where you can pick from either SD or USB, whichever you have your games stored in.

Step 6: Download your ROMS
I found the best place to get roms are;
Just like all the other zipped folders, just extract the roms one by one in the “roms” or “games” folder of the emulator you are going to be using. Only Nintendont requires the file change of “game.iso”
Thats it! Wii-Retro at its finest. Got anything to add or did you run into a snag, feel free to drop a message.